ทำการติดตั้ง CUDA sdk ลงบน Server ซึ่งเป็น Ubuntu 9.04
และทำการทดสอบการรัน โปรแกรม VecAdd.cu
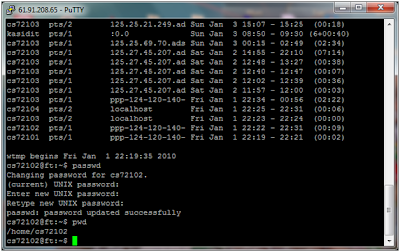
Step 1 :: Login Server
ทำการ download program CUDA sdk จาก web site หรือทำการ copy จากแหล่งที่มาใดๆ
กรณี 1 ทำการ download โดยตรงจาก web site ให้ทำการพิมพ์คำสั่ง :
กรณี 2 ทำการ copy file sdk มาจากแหล่งอื่น ให้พิมพ์คำสั่ง :
$cp /tmp/cudasdk_2.3_linux.run /home/cs72102/cudasdk_2.3_linux.run
(ทำการ copy files จาก /tmp/cudasdk_2.3_linux.run ไปวางที่ /home/cs72102/cudasdk_2.3_linux.run)
ก่อนการติดตั้งให้ทำการกำหนด values of environment 1. set path nvcc ด้วยการพิมพ์ : $export PATH=/usr/local/cuda/bin:$PATH 2. set path library ด้วยการพิมพ์ : $export LD_LIBRARY_PATH=/usr/local/cuda/lib64:$LD_LIBRARY_PATH ในขั้นตอนการติดตั้งเลือก install path files เป็น dafault path files $/home/cs72102/NVDIA_GPU_Computing_SDK
ทำการติดตั้งด้วยการพิมพ์คำสั่ง :
ดังนั้นจะเกิด files NVDIA_GPU_Computing_SDK. อยู่ที่ Home user ซึ่งในที่นี้จะอยู่ที่
ทำการทดสอบว่า nvcc ทำงานได้หรือไม่ โดยการพิมพ์คำสั่ง :$nvcc -V แสดงผลลัพธ์ตามรูป
Additional -->Compiling for Hardware Emulation
สำหรับบางระบบที่ไม่มี CUDA-capable GPU
จำเป็นต้องสร้าง Emulated สำหรับ Hardware ด้วย
โดยการไปที่ path file ที่ทำการ install sdk แล้วทำการพิมพ์คำสั่ง :
$make emu=1
ซึ่งผลลัพธ์จะไปแทนที่ใน bin/linux/emurelease
Run "deviceQuery"
เพื่อแสดงการ์ดจอของเครื่อง server 61.91.208.65โดยพิมพ์คำสั่ง :$./deviceQuery Run "bandwidthTest"
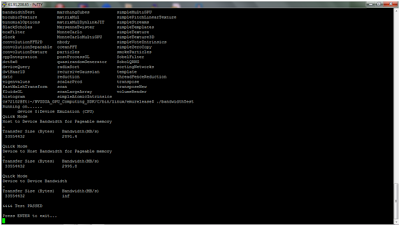
เป็นการแสดงขนาดการส่งข้อมูลระหว่าง device กับ host , หรือ host กับ device , และ device กับ device
โดยพิมพ์คำสั่ง :$./bandwidthTest
Step 3 :: Complie & Run Program VecAdd
แล้วทำการ upload ไปวางใน server หรือทำการเปิด editor ขึ้นมาแล้วเขียน code ด้วยคำสั่ง:$vim VecAdd.cu

Source Code
[ VecAdd.cu]
ไม่มีความคิดเห็น:
แสดงความคิดเห็น