# -ทำการติดตั้งโปรแกรม Source-Navigator บน Ubuntu [Base OS] ด้วยคำสั่ง
- $ tar xjf sourcenavigator-NG
- $ cd sourcenavigator-NG
- $ ./configure
- $ make
- $ sudo make install
# -ทำการ Create Project แล้วค่าเชตให้ Path File ชี้ไปที่ QEMU-KVM ที่ติดตั้งจาก Exercise ก่อนหน้านี้

2. Study the file vl.c and describe what happen when KVM detect “-hda” option.
# ทำการเปิดไฟล์ vl.c

# ทำการค้นหาคา –hda จากเมนู Search

# แสดงบรรทัดที่เจอ –hda ซึ่งเป็นคาสั่งที่ทาการเรียก drive_add()

3. Also, answer which function read the “-hda” option string?
# ทำการค้นหา –hda ในรูปแบบ string ,พบว่าเป็นการเรียก function drive_add ()
# แสดงบรรทัดที่เจอ “hda”
4. Draw function call graph involving the “-hda” option as deep as you can and describe the functions in the graph.
# QEMU_OPTION_hda ทาการเรียกฟังก์ชั่น qemu-options.h

5. The three important functions that control KVM operations are main(),main_loop(), and main_loop_wait().
What do you think these function do? Use your best educated guest. (I don't expect the exact answer, but I want to hear your ideas.)
a) main() : ทำหน้าที่เป็น Main Program
int main(int argc, char **argv, ;char **envp)
{ const char *gdbstub_dev = NULL;
uint32_t boot_devices_bitmap = 0;
…
…
…
main_loop();
quit_timers();
net_cleanup();
…
return 0;
}
b) main_loop() : จะถูกเรียกใช้ต่อจาก main()
แล้วทำการเรียก kvm_main_loop()
static void main_loop(void)
{ int r;
if (kvm_enabled())
{ kvm_main_loop();
cpu_disable_ticks();
return; }
แล้วภายใน kvm_main_loop()
การเรียก main_loop_wait()
c) main_loop_wait(). : ทำงานต่อจาก main_loop() เรียกใช้งานเกี่ยวกับเวลา
void main_loop_wait(int timeout)
{ ...
qemu_bh_update_timeout(&timeout);
host_main_loop_wait(&timeout);
qemu_mutex_unlock_iothread();
...
}
6. Study the “bdrv_open()” function and describe what you think the function is for.
# ทำการเรียก function bdrv_open2(bs,filename,flags,NULL);
7. Insert two “printf” statements at beginning and end of “bdrv_open()” function call and describe what you see when the you call KVM using “base-OSimage.img” versus using “myoverlay2.ovl” (from Exercise 4) as the hda disk.What are the different and why so?
# ทำการเพิ่ม code เพื่อแสดงข้อความก่อนเรียกใช้ Function และหลังเรียกใช้ฟังก์ชั่น
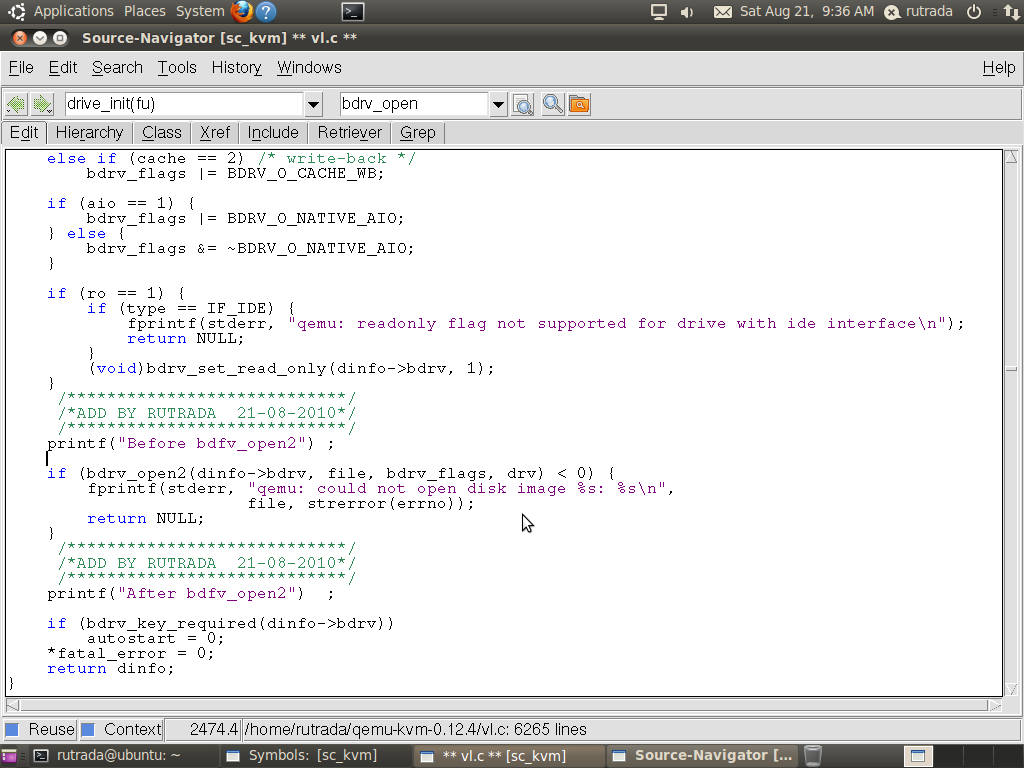

a) ทำการเรียกใช้ฟังก์ชั่น จาก “base-OS image.img”

b) ทำการเรียกใช้ฟังก์ชั่น จาก “myoverlay2.ovl” (from Exercise 4)
มีการเรียก
 c)
c)Show Difference
ที่ BASE image ทาการเรียกใช้ bdrv_open2 = 8 ครั้ง

1>>2>>3,4 5>> 6>>7,8
ที่ Overlay image ทาการเรียกใช้ bdrv_open2 = 14 ครั้ง

1>>2>>3,4 >>5>>6,7 >>8 >>9>>10,11 >>12>>13,14
References:
1. http://sourcenav.sourceforge.net/
ไม่มีความคิดเห็น:
แสดงความคิดเห็น